Start by opening a USD scene and inspecting it. Then launch the same workflow from a script so you can reproduce the scene, outputs, and checks. The workbench examples on this page use Isaac Sim 6.2.
Choose an installation for the job
- InputOpen one scene
USD → Stage and PropertyFind the scene objects and inspect their settings in the GUI.
- ProcessRepeat the run
script + camera pathUse those same scene settings for a scripted capture.
- OutputRead the output
RGB · depth · masks · result reportInspect generated files with the CPU checker.
| You want to | Start here |
|---|---|
| Inspect a scene, edit physics, and use the viewport | The Workstation package on a supported RTX desktop. |
| Launch from a project Python environment | The Isaac Sim 6.2 Python package in a Python 3.12 environment. |
| Generate data on a remote GPU | A supported installation in headless mode or the Isaac Sim container. For remote interactive use, follow NVIDIA's WebRTC setup. |
| Check a recorded dataset | The CPU portion of the workbench lab, which uses Python and OpenUSD. |
Check your driver and GPU before downloading. For Linux x86-64, download the 6.2 Workstation ZIP from the release download page. In a desktop terminal, run the following after saving the ZIP in ~/Downloads.
mkdir -p "$HOME/isaacsim-6.2.0"
unzip "$HOME/Downloads/isaac-sim-standalone-6.2.0-linux-x86_64.zip" -d "$HOME/isaacsim-6.2.0"
cd "$HOME/isaacsim-6.2.0"
./post_install.sh
./isaac-sim.compatibility_check.sh
./isaac-sim.sh
Review the license prompts and give the first launch time to populate its shader cache. The compatibility app checks hardware, driver and display. If a dependency check fails, fix that layer and repeat it before changing project code. Use a different download on aarch64, and check the release notes for that platform.
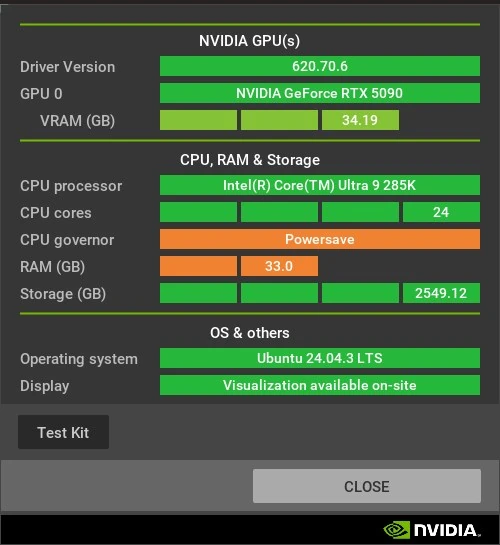
This check ran in the Isaac Sim 6.2 container with a display attached. The OS field describes the container. The NVIDIA GPU and driver fields describe the hardware and driver it could access.
For pip, use the official install command in a separate environment. The two methods have different entry points. Choose the one you will use for the course.
python3.12 -m venv .venv-isaacsim
source .venv-isaacsim/bin/activate
python -m pip install 'isaacsim[all,extscache]==6.2.0.0' --extra-index-url https://pypi.nvidia.com
isaacsim
Reproduce in a script what you inspected in the GUI
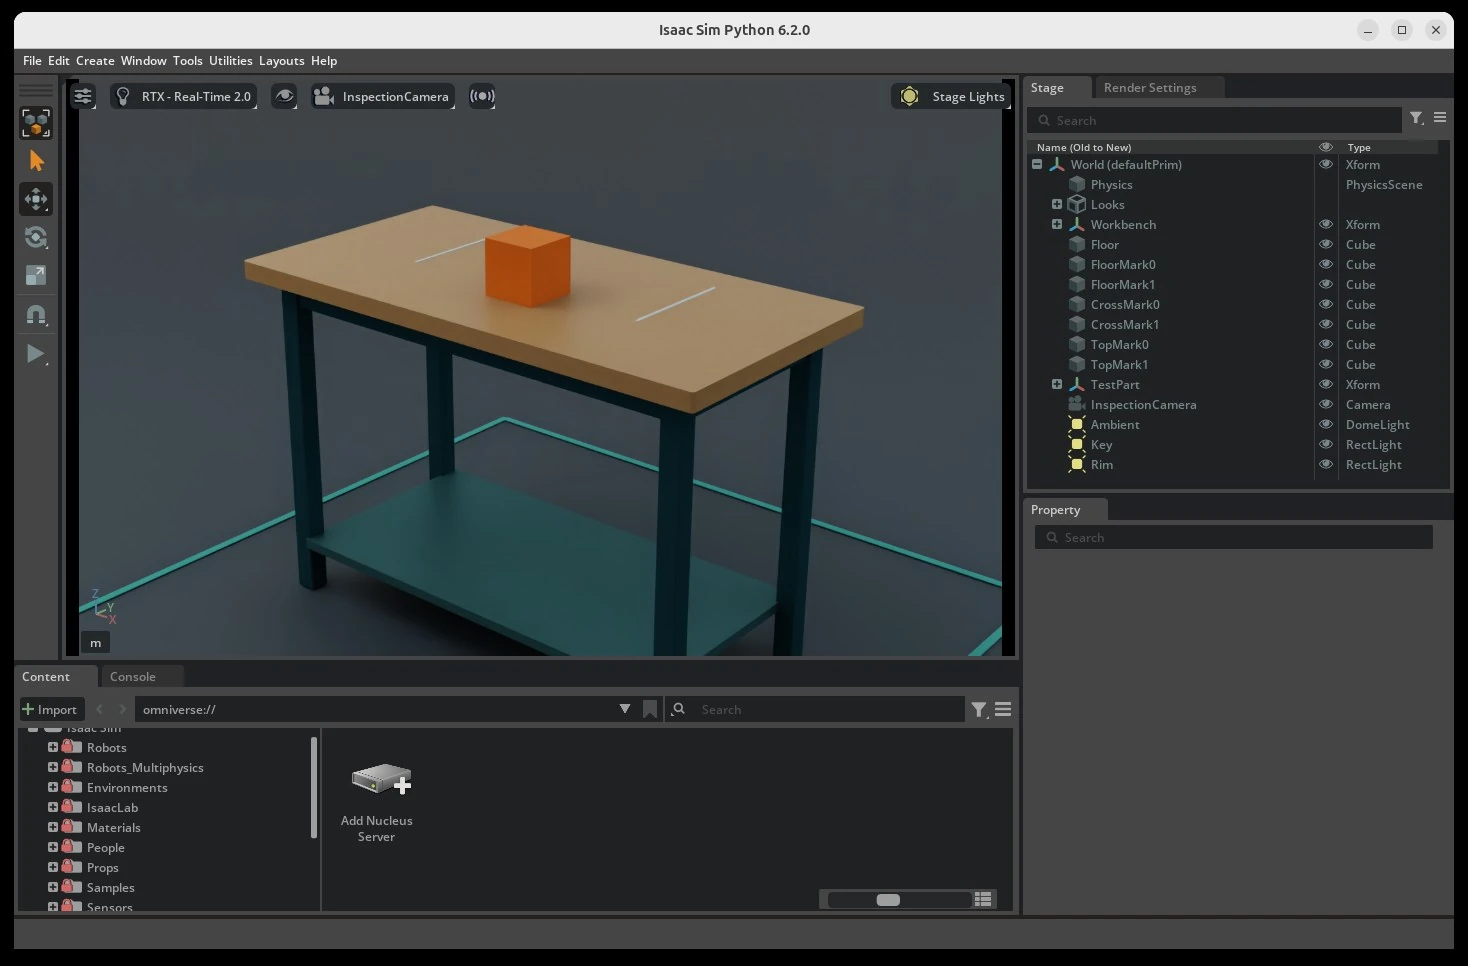
Stage displays the USD prim hierarchy and Property shows the selected prim's properties. Play lets physics advance the scene state. A script can open the same scene, select a camera or collider, and save images and reports.
Headless capture runs without opening a window and still uses RTX to render the camera. The CPU check reads saved arrays and needs no rendering. You can confirm the USD and camera path in the viewport, run the capture headlessly, then copy the results to another computer for inspection. Isaac Sim Python installation
Open and inspect the workbench in the GUI
- Use File → Open and select
workbench_scene.usdafrom your checkout. - In the Stage panel, expand
/World. Select Workbench → Tabletop to inspect the mesh and its collider in Property. TestPart is the rigid body. Its Geometry child has the cube mesh and collider. - In the Viewport camera selector, choose InspectionCamera to see the angle used for the data. Use the Play control to drop the cube and Stop to return to the authored starting state. If you want to experiment with deleting a collider, first save a new copy with File → Save As.
- Use the Console to inspect warnings, and Window → Script Editor to query the current stage with Python. Press Run in the editor with this code.
import omni.usd
from pxr import UsdGeom, UsdPhysics

stage = omni.usd.get_context().get_stage()
tabletop = stage.GetPrimAtPath("/World/Workbench/Tabletop")
print("Meters per unit:", UsdGeom.GetStageMetersPerUnit(stage))
print("Tabletop collider:", tabletop.HasAPI(UsdPhysics.CollisionAPI))
Expect 1.0 for meters per unit and True for the collider. The editor uses the running Kit session and its current stage. GUI reference · Script Editor
Run and check the same pipeline from the CLI
In the workbench project, CadQuery makes the STEP mesh input and workbench_final_take.py creates a fresh simulation stage. The Workstation launcher python.sh sets up Kit and Isaac Sim's Python paths. In a pip install, run the capture with the active Isaac Sim environment instead.
# From the repository root, after the CAD step:
"$HOME/isaacsim-6.2.0/python.sh" labs/scene-to-data/workbench_final_take.py \
  runs/workbench-live/cad_meshes.json runs/workbench-live

# Back in the CPU check environment:
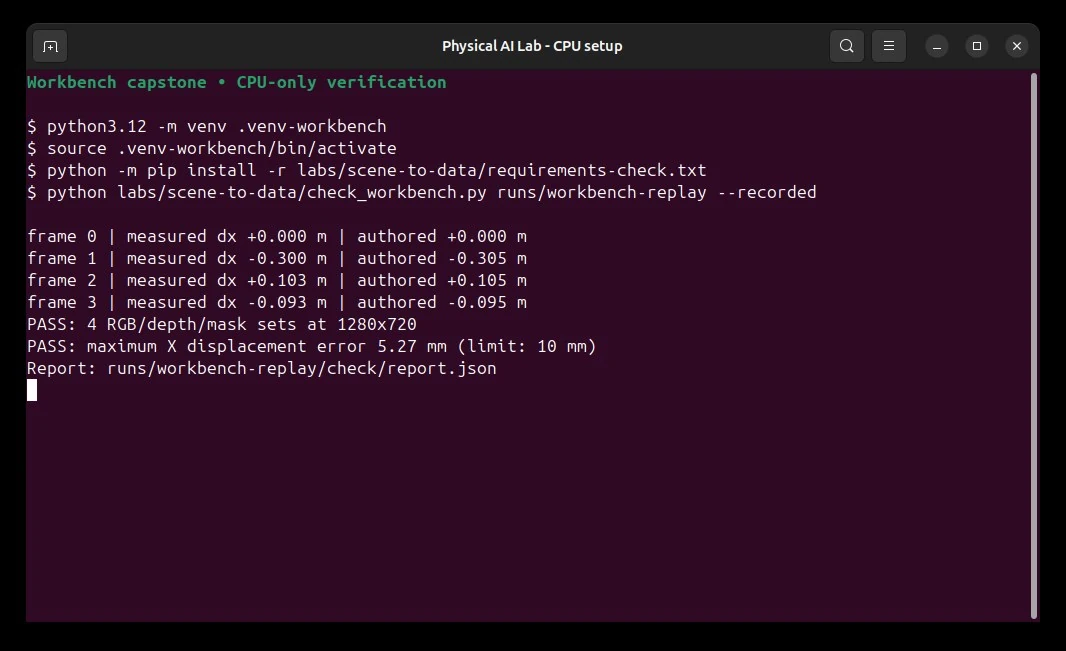
.venv-workbench/bin/python labs/scene-to-data/check_workbench.py runs/workbench-live
Use --headless on the capture command when you only need output files. Use a terminal on the GPU host for capture, then read the generated check/report.json on any machine. With repeating jobs, keep each run in its own directory and capture the simulator log with 2>&1 | tee capture.log in Bash. Use set -o pipefail so the pipeline reports a simulator failure too.
Know which tool to open next
| Task | Tool |
|---|---|
| Inspect one camera, collider, rigid body, or joint | Isaac Sim GUI. Use Stage, Property, Viewport, and Play. |
| Query or modify the open stage with a few lines | Isaac Sim Script Editor. Use standalone Python when you want the script to create its own app and run repeatedly. |
| Author or inspect a scene independently of Isaac Sim | OpenUSD Python API. A full OpenUSD tools install also supplies usdview, usdcat, and usdchecker. The CPU lab only needs the usd-core Python wheel and has no usdview requirement. |
| Produce camera data with known labels | Replicator. Attach RGB, depth and semantic annotators to the same camera render product. Replicator examples |
| Train a policy across many copies of a task | Isaac Lab. Match the Isaac Lab release and physics backend to your Isaac Sim compatibility matrix. Microduck training lab |
If the GUI scene opens and the CLI fails, check which Python is active and whether the standalone script starts SimulationApp before loading Kit modules. If the scene works but outputs are missing, inspect the render product, semantic labels, output path and simulator log before changing the driver. Official standalone examples